Saturday, July 23, 2016

Alpine Escape to Santa Fe Baldy

View of Lake Katherine from just north of the summit proper
Feel like getting a small taste of Colorado here in New Mexico? High altitudes, alpine lakes, marmots, hiking above timberline, and lots of water make this a very different area from where I'm used to going! Just to the east/northeast of Santa Fe,NM lies the Pecos Wilderness, which is home to some of the most beautiful backcountry and alpine terrain that I have ever hiked in the state. I recommend ANY of the hikes in this area to anyone looking to get out. If you've mostly just hiked in the Sandias or any of the desert areas around Albuquerque, this will be a big change. At ~15 miles round trip, this is one for the folks a bit more in shape. I do warn that you REALLY do want to make sure you are in shape for this as well as prepared.
One of the first views of Santa Fe Baldy along the Winsor Trail
To get to the trailhead for this adventure, you're going to make your way to the Santa Fe Ski Basin. From Albuquerque, you'll take I-25 North to Santa Fe. You'll exit either on St. Francis Road or Old Pecos Road. I haven't taken the Old Pecos Road route, but on a map it looks like the most straightforward way, as there is a lot of easy-to-miss turns via the St. Francis route. Either way, you're going to go into Santa Fe for a bit on said road until it runs into NM 475. Follow the signs to make sure you stay on NM 475 (that is where the easy-to-miss turns come in), and once you start driving into the hills you are good to go. Follow that road all the way to where it ends up at the top of the mountain. Park in any of the huge parking areas at the Santa Fe Ski Basin, and you're there!
That morning light through the trees!
So this trail connects three trail really. Winsor, Skyline, and the spur going up to the Santa Fe Baldy. This makes for either a great overnight camping trip, or an exhausting albeit worthwhile dayhike. I am a big fan of long dayhikes, so I did just that. I started on the trail at just after 7am, but I came across a couple of gentlemen on the trail who started just after 3!
Rio Nambe
The Winsor Trail is where the hike begins. The trailhead for this is on the east/northeast corner of the parking area. Right away you walk into beautiful, dense forest and immediately cross and follow the Rio Medio. For the first mile, the trail switchbacks up and up out of the ski basin until arriving at a saddle where you reach the boundary for the Pecos Wilderness. This is a gorgeous open area that I usually stop for a drink at.
Life can be found everywhere
From the boundary, you stay on the Winsor Trail and it starts to wind around on the north facing slopes. At just beyond 2 miles, you'll reach the Rio Nambe, and the turnoff for Nambe Lake. Nambe Lake is a worthwhile hike itself, and I'm sure will get a post of its own some day. The Rio Nambe can be quite impressive depending on the time of the year, but luckily the little bridge that crosses it holds up quite while even when the flow is heavy and powerful.

After crossing the Rio Nambe, the trail follows the contour of the north-facing slopes for roughly a mile or so before the slopes start to level out, you're hiking along another stream, and then it starts to lift up. It's very gentle hiking most of the way, and you get beautiful views and peeks of Santa Fe Baldy throughout the way. It looks so distant in the beginning, but slowly gets closer and closer.
One of the many great views of SF Baldy
Lots of wildflowers along the trail in summer!
Rocky Mountain Columbines...my favorite.

One of the few stream crossings


After the final stream crossing, the trail switchbacks up and out of little "valley" and nears the first trail intersection. At around 5 miles you reach a big beautiful meadow! At this meadow is the intersection with the Skyline Trail, which is what you'll be taking north from here. The meadow provides many opportunities for shade to sit and relax or break and eat. On my way down I sat my pack on the ground here, lay my head back on it for a while, and closed my eyes to just hear the breeze.

Just east of the intersection, perfect spot to set up camp!
Another view of the Great Meadow
Winsor Trail continues east, but this hike catches the Skyline Trail and starts heading north. The trail goes straight towards the ridge for a bit before switchbacks appear to make the upward ascent a little easier. Just before it reaches the ridge, the trees start to thin out, and before you know it, you're hiking above timberline! At the crest of the ridge, there is a trail intersection. If you keep going east/northeast (straight) along the trail, you'll be heading to Lake Katherine. For the Baldy, you will turn left at the intersection, following the lesser used, but still obvious trail. From here it becomes quite taxing!
Looking south at Penitente and Lake Peaks from above timberline
Looking east into the vast expanse of Pecos Wilderness on the way up the ridge
The view of Santa Fe Baldy as you near the ridge
From here it is straight forward. You just follow the trail along the ridge up and up...and then up some more. You gain more than a thousand feet in elevation from the intersection to the summit, and it feels like it. About halfway up the ridge, you finally hit the 12,000 foot mark. There is no sign to mark it, but it is just a nice waypoint to notice if you have an instrument like a GPS that will measure your altitude. The views get better, and you're just hiking around small boulders and lots of open, green grass on the way up. It gets quite steep, but just keep pushing.
On the way up the lower part of the ridge
This little fellow didn't mind me getting too close
The right-most peak is the actual summit. This view shows you're almost done with the worst of it!
Eventually the trail starts to level out, and it becomes such a pleasant stroll along alpine, boulder-strewn meadows. I did this hike in July, and there were still snow drifts on the eastern side of the ridge up here. The summit is marked by a large pile of rocks. Once you make it here, you are roughly 12,600 feet in elevation! And this is where you can generally find people to be sitting, admiring the views in all directions. And what views they are! Out west are views of a huge burn scar (from what fire and when I do not know), out east are gorgeous views of the rolling Pecos Wilderness, down south are views of Lake Peak and Penitente Peak, and to the north you get wonderful views of Redondo Peak, East Pecos Baldy, and the Truchas peaks.
The general feel of the trail up top
The summit in sight!
Views of a massive burn scar
Looking at the ridge that was just ascended
If you go just to the north of the summit. There is a boulder-strewn overlook that provides incredible views of Lake Katherine below! Following this small ridge down just a little bit makes for a nice place to sit and take a break. It was near this area that I saw a couple marmots. Their squeaks are much easier to hear than they are to see usually. I advise taking as much time as you like to enjoy the views here and at the summit before turning back. It is such a wonderful place to just be, and enjoying it fully is the least you can do for yourself after the journey to get here.
Marmot calling out
View of Lake Katherine, with the Truchas Peaks in the distant left

After all the time spent soaking in all the beauty, and probably letting your heart rate calm and lungs relax, you'll take the same way back down as you did up. I won't post directions or anything, as you will know it once you've made it up here. The trek back may not be as exciting as the way up, but it is still a very enjoyable and pleasant hike.
View of Lake Katherine a little farther north on the ridge
Bring plenty of water (a filter if you have one), lots of calorie-packed foods, and all the other essentials, and go place yourself out in this beautiful part of the state. It is worth the drive, it is worth the many miles on foot, and it is worth the shortness of breath near the top. This is honestly one of my favorite hikes I've ever done, and most of the people I encountered along it seemed to be enjoying it just as much! I generally favor solitude, which is not to be found much along this area on weekends, but the people did not detract from the beauty here whatsoever. So go on, and just as always...don't take my word for it, find out for yourself!!!
Happy Trails :)

Monday, August 24, 2015

Cliffside Real Estate In The Sandias

Overlook just past the "cabin"

The Sandia mountains stand so tall along the eastern edge of Albuquerque, peering down at all the human-ants zipping along the roads, going from home to the store, from home to work, yadda yadda yadda. The mountains are very iconic, with such prominent features as The Shield, The Needle, Muralla Grande, and more, all visible and distinguishable from the city of Albuquerque. This is where most people go to escape the city, for even though it sits on the edge of a metropolitan area, the wilderness here is still wilderness.
View of the ridge behind (and including) The Thumb from the Crest Spur Trail
Inside this wilderness there are so many unique places, from shallow caves, to waterfalls, to mines, and even some faint remainders of old structures. Because of geocaching, I have found a lot of these places by searching for caches that others have placed near the locations. Today I decided to take my chances and head out to find the very jumbled remnants of what looks like it was a cabin in the making, and find another cache near another cliff, which I had failed to find in the past. I am going to give a big warning right now to anyone who might be interested in this hike. This is NOT on an official trail, you will be doing some very steep offtrail scrambling on and between nothing but game trails at one point. It is very near and above some grandiose cliff faces that would result in death if one were to fall off them. If you have faith in your ability to maneuver and navigate off trail in steep terrain, then go for it. However, if you have any doubts, DO NOT TAKE THE RISK.

I never see the parking lot this empty!
This hike starts at the crest house at the crest of the Sandias. To get here, follow the directions given in the "Escaping The Heat At Sandia Peak" post.
Hiking down the Crest Spur Trail
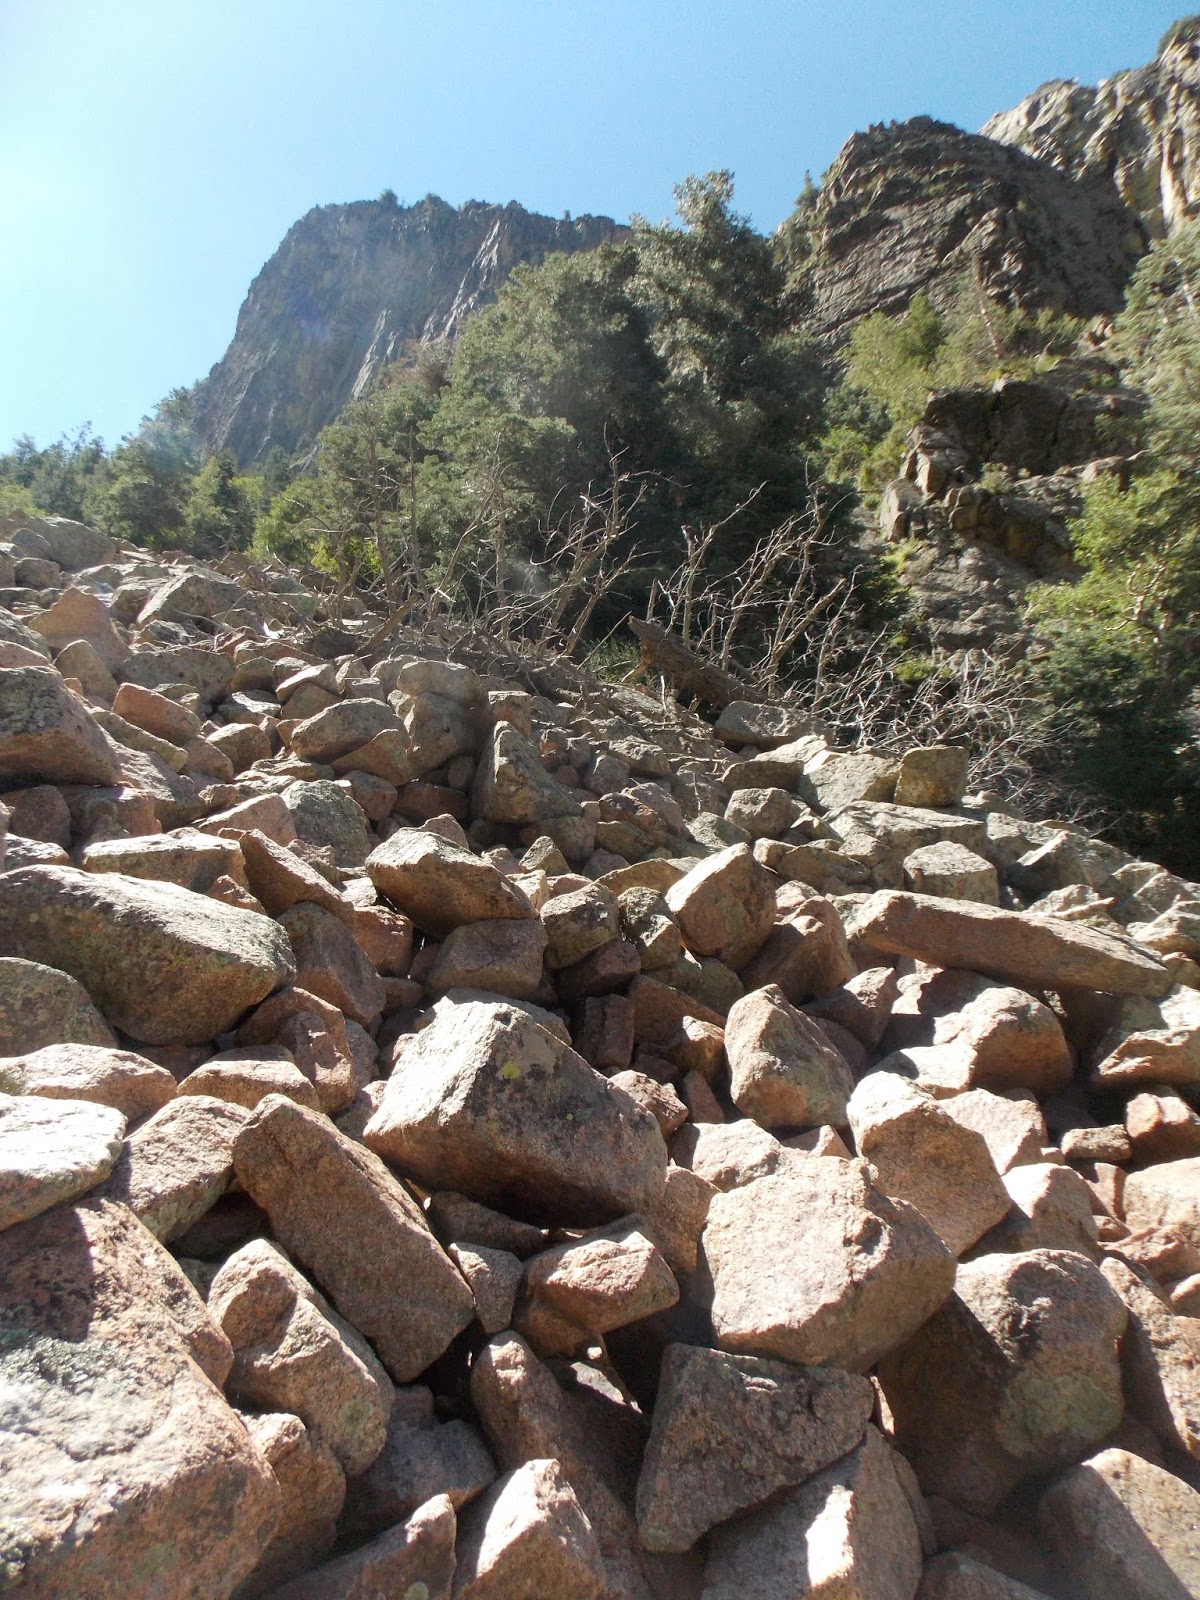
There are a number of ways to get where I was wanting to get today, but I took what looked like (and what I believe is) the easiest route. I started down the Crest Spur Trail, the connector trail with La Luz. This trailhead is located on the immediate south side of the Crest House. This trail goes all the way to La Luz, but that distance isn't necessary today. You need to pay attention going down, as it is very easy to miss the turnoff. When going down, you start at a northwest direction, the trail then quickly reaches a switchback. Keep going down until you reach the 3rd switchback from the top. From there is a very faint trail that heads northwest, which is what you're going to follow. Stay low, and follow until it reaches an incredibly steep, loose, and rocky slope. To continue, I descended down this rocky slope very slowly, sometimes using all limbs to make sure I didn't slip. This is one of the more dangerous sections, so watch your footing and balance very carefully as you work toward the bottom of the slope.
Looking up the steep, rocky slope that must be descended and ascended
When you get closer to the bottom, it appears to fork. If you follow the right fork, you can find a very faint game trail that goes north/northwest. I followed this as best as I could, though it was inevitably lost very quickly. You pass through a steep meadow, approaching a beautiful stand of aspens. Try to find the easiest route heading west/northwest through the aspens toward cliffs. If you follow the general contour of the original game trail, you will end up at a beautiful overlook, though below the "cabin."
Aspens you hike through
From this overlook, hike up but stay near the cliffs going north. As you gain some elevation, the cliffs draw farther west and a small "peninsula" forms. Go west along this formation and the tumbled logs of this "cabin" come into view. It looks like someone started to do this and then had to stop before going too far. There are other pieces of old sheets of wood lying around in the area as well.
Corner of the ''cabin"
Why anyone would start building anything on this area is a question we may never have the answer to, but looking at the views from where it sits, I can think of one possible reason! Coming out super early in the morning, there is a stillness and silence that is difficult to match later in the day. After making it, I sought after the cache. The geocache that brought me here sits a little bit farther out on the rocky lookout, very near the edge. It's listed on geocaching.com as "Lost Cabin Cache" for any of those interested.
Same logs from a different angle
Looking south from the rocky overlook by the "cabin"
Southwest corner of structure
This is an excellent place to take a snack break, admire the views, contemplate the reason for the apparent structure, and just appreciate everything that surrounds you. This is a seldom-visited part of the mountain, even thought it sits above and below two of the most popular areas. Follow the way you took back as best as you can, though you are almost guaranteed to lose the game trails again, as it is very overgrown here. Try to keep higher up to make sure you intersect the rocky slope you came down. Going back up the slope was easier than coming down, in my personal experience and opinion.
Beautiful flowers along the Crest Spur on the way back
More flowers higher up on the CST
Once at the top of the steep, rocky slope, head back south along the limestone cliff band until you reach the Crest Spur Trail to follow it back up.

Looking south from an overlook on the Crest Spur Trail

This is a relatively short hike, but it is not by any means easy. Make sure to bring a topo map (and know how to read it) with you in case you lose track of where you are. The limestone bands are always to the east, and the huge granite cliffs are always to the west. I cannot stress the importance of accurately and fairly assessing your own abilities and letting that determine how far you go. If you don't feel comfortable with going down or up anything here, then turn around. It is not worth the risk, and there is plenty more on this mountain to go enjoy. For those of you who feel it is something you can likely do and are interested in doing, get out there and go for it! There are many other geocaches along and below the crest area for those out here with that purpose. Ode To Frank Zappa was another nearby cache I tackled after this, and that one also provided spectacular views.
View from near Ode To Frank Zappa cache below the towers

Looking down the cliffs near the cache
This is a great short outing, which takes you to a new, beautiful area, while providing a bit of adventure for those who like to hike off the beaten path. I may be exaggerating the danger a bit, but I like to lean to the safe side, and not try to convince anyone to do anything beyond their personal limits. So, with that being said...I hope you've enjoyed the post! As always, don't take my word on how beautiful this area is, get out and find out for yourself! Happy trails and stay safe!


Wednesday, August 19, 2015

Hiking Up Into Big Rock Country On La Luz

The Thumb is a striking formation, staking its claim in upper La Cueva Canyon
Where to begin. This is a blog post I have looked forward to doing for a really long time, and now that it is here, the words to describe it (if there really are any) have slipped away. This hike is grand, striking, humbling, beautiful, exhausting, rewarding, dramatic, and a thousand other synonyms for these words and more. This hike marked a major milestone in my Sandia exploration years ago, and it exists now as a somewhat spiritual adventure for me anytime I venture out onto its path. I may be talking rather highly of it, but that is because I truly feel that this is one of the best hikes to do in the area...it is one of my favorites of all time. This hike is the famous 7.5 mile La Luz Trail.
The TH for the Tramway trail, which connects to lower La Luz
There are couple of different ways to do the La Luz trail. It goes all the way to the top tram, which makes loop hikes a possibility: you can, of course, hike the trail up and down for a 15 mile trip; You can take two cars and park one at the tram and another at the La Luz trailhead, and you can either take the tram up and hike down ($12 one way), or hike up and take the tram down; and lastly you can use the 2.5 mile Tramway Trail to connect the lower tram to the lower section of La Luz and then take the tram back down, or take the tram up and do the same hike in reverse.
Good morning, Albuquerque from the Tram Trail!
To reach the La Luz parking lot, take Tramway Blvd. (east from I-25, north from I-40) to Forest Service Rd. 333, which is at the only major curve on tramway. Travel along this Forest Service road and follow the PAVEMENT all the way to the end, following signs to La Luz parking lot. Near the end the road goes straight but changes to dirt, do not go onto the dirt road, turn right and follow the paved road all the way back to the parking lot. There is a $3 fee to park here.
To reach the Tram parking lot, take Tramway Blvd. to the only stop sign along its length at Tramway Road, turning onto Tramway Road and following it to the parking lot at the lower Tram Terminal. There is a $1 parking fee at this lot.
Looking up to the hill just north of Tower 1
When doing this hike solo, it's best to use the Tramway Trail to connect the tram terminal with the La Luz Trail. If you are with at least one other person and have another car, you can park one at each trailhead and shuttle instead of hiking the additional 2.5 miles. I did this hike solo, starting on the Tramway Trail. This is exposed hiking in the foothills, and it is uphill, so it is best to start with this trail, and the earlier in the day the better. I got out here to begin my hike at 6:30 am, with just enough time to get to La Luz before the sun started shining on me!
Looking east from the Tram Trail
The tramway trail is consistent its entire length, traveling through typical foothills terrain the whole way. It's a pretty steady hike until you get about a mile or so from the end. That last mile gets more and more uphill (this is why I avoid doing this part of the trail last, and doing it in the sun), taking you up to meet with La Luz. Though the Tram Trail is dull in comparison to La Luz, it provides gorgeous views east as it passes by Rozamiento Canyon and La Cueva Canyon and the ridges in between.
Foundation of CCC Cabin just west of the Tram Trail

The Tram trail connects about a mile up the La Luz Trail. By this point the terrain is already starting to change, with more evergreens and starting to sprinkle onto the landscape. For those who are somewhat out of shape, like myself, this is an excellent spot to take a break, rehydrate, and possibly refuel. You'll need your energy for all of the switchbacks that lie ahead of you!
Those rocks peeking up are near where the trail goes!
The lower part of the La Luz trail is pretty, but still no different than many of the neighboring trails on this side of the Sandias. However, it does provide you with excellent views of Albuquerque, Rincon Ridge, lower Juan Tabo Canyon, and far off formations like the west-side Volcanoes and Mount Taylor. The trail travels through high desert terrain, following multiple switchbacks up the steep hillsides to moderate the intensity.
Looking at La Cueva Canyon rock formations
Just after 2 miles, the trail ceases the apparently never-ending switchbacks, heading east for a brief moment toward Chimney Canyon. There is a sharp curve at Chimney Canyon that is significant (at least to me) for two reasons. First, it marks western terminus of the highly adventurous Chimney Canyon trail, which goes pretty much straight up the mountainside from here. Second, at this sharp curve, there is a small stream that flows down from Chimney Canyon, providing a brief moment of lush vegetation. Down below the trail is a small, shaded spot right next to the stream...a perfect spot for a break! The stream flows below you here down small dropoff, which can be heard from the trail nearby in heavy years.
The sun has finally come up, and it is beautifully lighting the landscape!
After leaving Chimney Canyon, the trail starts winding up again, passing around a large rock formation from which you can gain spectacular views down into La Cueva Canyon! I love to stroll over to this rock peninsula and just soak it all in. Below you is the incredibly rock La Cueva Canyon, and just east inside the canyon is a small section known as the Slot, which is a very narrow section of steep rock. In heavy, wet years you can hear waterfalls flowing below. But, alas, it was quiet on this morning.
Break spot next to small stream
This is where the water flows down below the rest area
Looking up into the massive cliffs above Chimney Canyon
The trail continues on, hugging middle La Cueva Canyon for a moment before darting away once more, following switchbacks of to the side. There are a lot of wildflowers up here in the late summer, and a ton of hummingbirds zipping around from flower to flowers! The switchbacks take you to the bottom of a formation known as The Pulpit...one of the first major formations heading into La Cueva Canyon. You can see a cool, small cave not far up on this cliff face. After a few switchbacks across the rockfall below this formation, the trail heads south to where the magic truly begins.
Looking toward the Slot in La Cueva Canyon
So many colorful wildflowers out at this time of year!
Small cave in the face of the Pulpit
Just over 4 miles up the trail, after passing the Pulpit, you round a corner and wind up at one of the most spectacular, scenic, and powerful views on the Sandias. With towering cliffs above you on the northern side of the Canyon, a ridge heading to a view of Albuquerque to the west, and the most incredible view of the Thumb. The Thumb can be seen from all along this trail, but when you reach this particular spot, it stands so powerfully, dominating the forefront of the canyon here.
Nearing the Thumb
The Thumb standing tall
This is a place of dreams
I could literally sit at this corner spot for hours, just staring up into the canyon and at the various formations. This is where I usually bust out the snacks and drinks, relaxing and letting the world behind me slip away. It's almost a spiritual experience to be here...it is the type of view/spot to make you think about your place in the universe and contemplate the beauty that exists in this world. Or maybe that's just me?
Southwest face of the Pulpit
Formation known as The Frog
From this scenic point, the travel travels east into the heart of upper La Cueva Canyon. Not far in, you'll pass a sign stating that you are 5 miles into the hike. From here, the trail goes back to it's lovely switchback nature, but this time the switchbacks travel up the rockslides below the Thumb. For the next 1-1.5 miles...you're in big rock country.
Sign at the bottom of the rockslides
Beautiful shaded forest in the bottom of the canyon
Looking up at the north/northeast face of the Thumb from the rockslides
The next mile or so is perhaps the most exhausting stretch of the hike, following the rocky switchbacks up the rockslide (I think there are 15 switchbacks going up!). There are lots of aspens along these slopes, decorating the southern part of the canyon with gold spots in the fall.  The footing along this part of the trail is not the best, so watch where you step. The trail is really well defined, it is just very rocky. Throughout this workout, however, you are rewarded with increasingly wonderful views of the towering rock formations in the canyon.
The Pulpit on the far left, followed by Yataghan, and Torreon finishing out the right side
Mexican Breakfast formation
The views of all of these formations just gets better and better as you get higher, and the trail takes you farther back still into La Cueva Canyon, becoming more forested as you near the limestone bands just below the crest. Just before you reach 6 miles into the hike, the trail departs from the rockslide and travels onto the more welcoming, soft dirt of the forest. Just after 6 miles, you reach the intersection with the Crest Spur trail. This trail takes you to the Crest House. You can take this and then take the crest trail over to the upper Tram Terminal, or you can continue on La Luz for another ~2.5 miles straight to the upper Tram.
Open skies and green ground along the Crest Spur Trail
Looking at the South Sandias from near the intersection
More wildflowers along the trail!
From this intersection, views looking toward the southern Sandias begin to open up. This view is such a drastic change from the rocky slopes in La Cueva Canyon, but it is no less dramatic. As you travel along this stretch of trail, there are points where you can see Kiwanis Cabin on the cliffs above, and incredible views of Echo Canyon and Domingo Baca Canyon below. Traveling along La Luz from here becomes much less of a workout, though the uphill battle is not yet finished.
Blocky peaks near upper Domingo Baca Canyon
Kiwanis Cabin, looking north from near the tram
Looking at the La Luz terminus at the Crest
The La Luz Trail travels up a good, maintained section of trail through the limestone bands to reach the crest. You arrive on the north side of the High Finance restaurant, a great reward if you have the money! I ended my day with another well-deserved snack on the steps by the ski-lift, admiring the views out east before purchasing my tram ticket, and taking it down to the bottom.
Ski lifts along the green green slopes of the east Sandias!
This trail is very difficult, with La Luz being 7.5 miles from the bottom to the top, and the described hike from tram to tram being ~9 miles. However, this is by far one of the most scenic and rewarding hikes on the Sandias. There are so many beautiful places to take breaks for those who need frequent ones, and it's just one of those places that really lets you feel just how small you are. This is perhaps the most popular trail on the mountain, and with good reason. Even though you are guaranteed to run into people on parts of the trail, it is mostly the bottom and the top, with the "crowds" thinning out along the middle portion of the trail. I recommend this trail to ANYONE who might be physically fit enough to do it. Even just traveling up partway can be rewarding depending where you turn around.
My words and pictures do no justice whatsoever to this hike. So as I always say, don't just take my word for it...get out and find out for yourself!